


Splurged on a shiny new monitor with a high refresh rate?
Whether you’re into competitive first-person shooter games, video editing, or simply enjoy enhanced motion clarity and responsiveness, high refresh rates can lead to more immersive computing experiences where the action feels smoother.
Employing the ideal refresh rate can ensure fluid and natural visual quality while reducing lags.
Here’s a comprehensive guide for configuring your monitor’s refresh rate.
What Is the Refresh Rate?
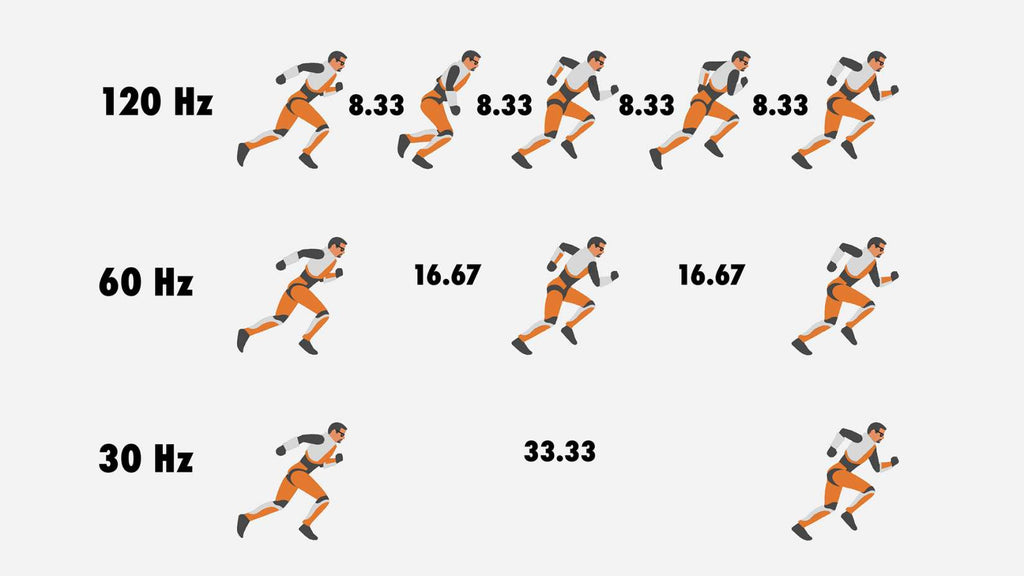
Refresh rate refers to the number of times an image refreshes or redraws on the screen per second. It is expressed in hertz (cycle per second). For example, a 60Hz display will update the screen 60 times per second, a 120 Hz refresh rate will update the screen 120 times per second, and a 144Hz setting will update it 144 times within a single second.
Most monitors support 60hz, which is adequate for decent-quality visuals that reduce power consumption. However, if you want unmatched clarity that allows you to see everything in detail, you may want to invest in more high-end models.
Importance of Refresh Rates Based on Different Computing Activities
Different activities, content, and applications require different refresh rates.
For example, if you’re using your monitor to browse the web, write, edit, or proofread documents, send emails, or perform other basic computing tasks, 60Hz is sufficient. This setting is enough to make the scrolling experience more fluid, offer visual comfort, and extend your battery life since it doesn’t put too much pressure on the processor.
On the other hand, if you’re a graphic designer or rendering artist who’s into visually intensive tasks, high-performing monitors with 120Hz, 144Hz, and 240Hz refresh rates will be invaluable. They allow images to update on the screen more frequently.
This reduces the amount of flicker, motion blur, input lag, and tearing on the screen, providing ultra-smooth content viewing. The same configuration will also benefit gamers, developers, and streamers who are highly dependent on the quality of their visuals.
Something to remember:
High refresh rates increase the energy your monitor consumes, which can have a significant impact on the battery. So, consider using Mac’s split view screen with this keyboard shortcut:
- Press Control + Command + F to enter full-screen mode.
- Press Control-Up Arrow or F3 to enter Mission Control.
- Drag another app you want to work with onto the app open in the full screen.
- Then, click the split view thumbnail.
This feature allows you to multitask and get more work done in less time. If it feels too cluttered, you can hide the menu bar, dock, and the window’s title and toolbar and make one side bigger than the other for more customized visuals.
Factors Affecting the Refresh Rate
When a fast refresh rate is a priority, look beyond your monitor’s supported rates. Also, consider the trade-off in terms of screen resolution. Higher refresh rates increase the number of pixels the graphics card has to render with each frame. This can affect your frames per second or FPS. It can tank the overall image quality and smoothness of the content and significantly impact the performance of demanding applications and websites.
It’s also important to ensure compatibility between your cables and peripherals to enhance how your graphic processing unit (GPU) and your entire computer system work. If you’re experiencing a subpar visual experience, use modern cables that can support high refresh rates or resolutions.
For example, if you have a VGA (video graphics array) cable, its capacity is capped at around 1920×1080 (1080p) at 60Hz. Hence, it may not support the maximum refresh rate of your monitor. So, consider swapping it with a DisplayPort cable, which handles up to 4K resolution at up to 120Hz. Or, switch to HDMI 2.1, which has a capacity for 4K at up to 144Hz.

Preparing To Change Your Monitor’s Refresh Rate
Even top-of-the-line monitors with high refresh rates require configuration now and then. So, if you’re experiencing flicker or ghosting, you might want to choose a refresh rate that’s more suitable to the task at hand. But before you do, here’s something you need to do:
Check the Maximum Supported Refresh Rate
What is your monitor’s refresh rate? There are two ways to find out.
- Option #1: Check the computer’s user manual or box. If you don’t have either on hand, you can go online to check the product’s specifications and its specific capabilities.
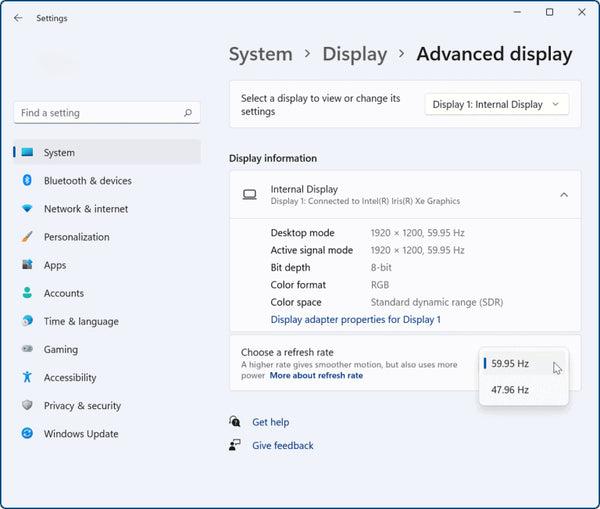
- Option #2: Check the supported refresh rates through your operating system’s settings. Depending on your OS, there will be minute variations to this process but you generally have to follow this flow to find it: settings > display > advanced display > display information. A drop-down menu will appear next to the “choose a refresh rate” option. Click on that, and you’ll see a list of supported refresh rates, with the highest being the maximum.
Check the Ports
This is one of the most important steps.
Ports allow data and information to flow between devices. If your display has a native refresh rate of 144Hz, but your cables don’t offer a similar bandwidth, they won’t deliver the maximum refresh rates. So, if you want a smooth viewing experience, make sure the ports are of the latest generation to avoid stuttering or lag.
Check Graphics Card Compatibility
If your monitor isn’t running at the correct refresh rate, check whether your graphics card (GPU) is compatible with it. If it’s outdated and isn’t producing the high frame rates you want, you’ll have to update your drivers to maximize its potential in terms of smoothness and responsiveness.
This can be done manually or automatically through the Device Manager on Windows. If you have a macOS device, you can do this through System Preferences.
Sounds like a lot? It can be.
The good news is most users won’t have to do the heavy lifting, provided your device and GPU support adaptive sync technology such as NVIDIA, AMD, and VESA. These GPU brands automatically adjust your monitor’s refresh rate based on the GPU frame rate, which can prevent or eliminate issues like screen tearing, stuttering, and input lag.
Safety Precautions and Warnings
Changing your monitor’s refresh rate can transform the way you work and play while offering a comfortable viewing experience. But if you keep using it at the maximum supported refresh rate, images may flicker due to pixel inversion.
Overclocking your PC and using refresh rates above its recommended settings through custom resolutions can also damage the input circuits while causing heating and damage to the video card over time.
If you want to get the most out of your investment, ensure your refresh rates fall within your monitor’s specific ranges and remain in sync with the frame rate. This will ensure decent playback quality and super smooth on-screen action.
Otherwise, it may manifest in distorted screen, tearing, and graphical glitches.
There may be times when you want to increase or decrease the refresh rate to accommodate the demands of certain applications. If this is the case, you can tweak the settings but make sure to create a system restore point to avoid damaging your device. The ability to quickly restore previous settings will be a big help if or when something goes wrong with your modifications.
How To Change the Refresh Rate of Your Monitor
Once you’ve performed the steps in the previous section, changing the refresh rate on your monitor will be fairly easy.
How you proceed will depend on your operating system. Here’s a step-by-step guide for fixing unstable display issues on three popular operating systems:
For Windows Users
To change your monitor’s refresh rate on Windows 11, 10, and 8:
- Access your display settings:

- In Windows 11 and 10, right-click on an empty area on your desktop and choose Display Settings. You can also get there through Settings > Display.
- If you’re on Windows 8, open the Control Panel via the Power User Menu. Then, select Display from the list of options on the window.
- Moving on to the next step:
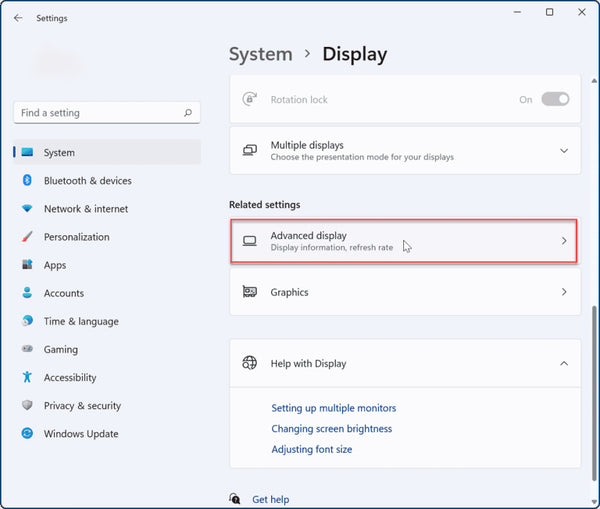
- In Windows 11, if you’re on the System > Display screen, scroll down and select Advanced Display under Related Settings.
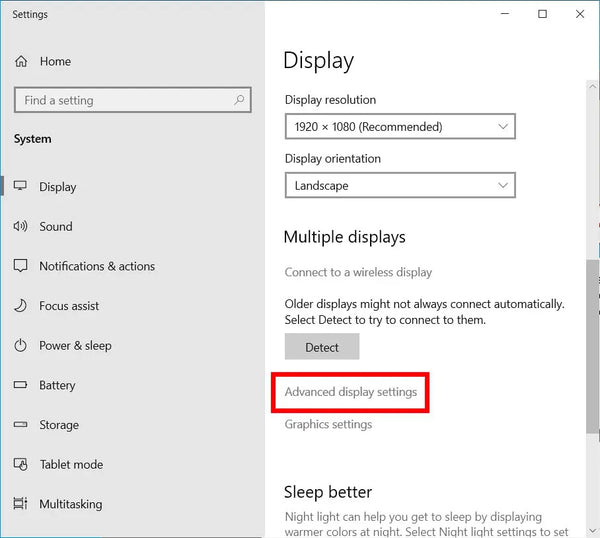
- In Windows 10, if you’re viewing the Settings screen, choose Advanced Display Settings from the bottom of the right pane.
- In Windows 8, click on Advanced settings, then select Adjust resolution from the left margin of the Display window.
- In Windows 11, if you’re on the System > Display screen, scroll down and select Advanced Display under Related Settings.
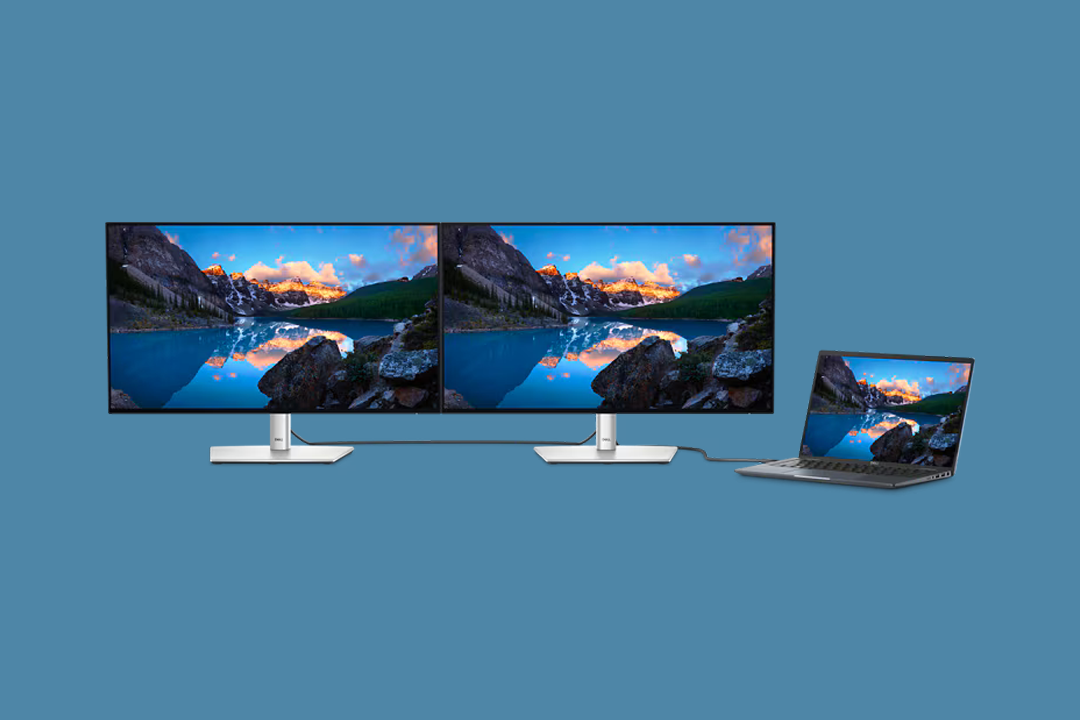
- If you’re using multiple monitors, choose the monitor you want to change the refresh rate for from the dropdown under Choose Display.
- Choose the Monitor tab from the menu that appears next.
- Adjust the refresh rate:
- Locate the refresh rate on Windows 11, then click on the drop-down box to select the desired refresh rate. You can also enable the Dynamic Refresh Rate(DRR) for a more responsive viewing experience.
- In Windows 10 and 8, choose Display adapter properties from the Settings screen. This will open the Monitor and Graphics Card Properties. Click on the Monitor tab and select your preferred refresh rate.
- Locate the refresh rate on Windows 11, then click on the drop-down box to select the desired refresh rate. You can also enable the Dynamic Refresh Rate(DRR) for a more responsive viewing experience.
- Select Apply to confirm the changes.
Once you’ve selected your desired refresh rate, your display may flicker briefly before the changes go into effect. This is normal. However, if your screen goes black or becomes unstable after changing the refresh rate, here’s what you need to do:
- Relaunch or refresh your graphics driver.
- Enable low resolution.
- Disable G-Sync and V-Sync for all applications.
If these steps fail to work, lower the refresh rate and restart your computer.
For macOS Users
Not all Mac displays are created equal. Only some allow you to change the refresh rates, like the 16-inch MacBook Pro, 14-inch MacBook Pro, and Pro Display XDR.
So, if you have these Mac products, here’s how you can configure them:
- Choose Apple menu > System Settings or System Preferences.
- Select System Preferences and click Displays.
- Hold down the Option key and click on the “scaled” radio button to check which refresh rates are available. The default is 60 hertz, so if that isn’t suitable for you, select from 59.94 hertz, 50 hertz, 48 hertz, and 47.95 hertz.

- The display settings will reflect once the changes have been applied. You can view some content or edit a video to see how the changes appear on-screen.
Follow the same steps to achieve your desired refresh rate on external monitors for the Mac. Just make sure to connect it to the Mac before you start.
Pro Tips:
If you have a model with Apple Silicon, you can enable ProMotion, which helps you get an adaptive refresh rate (twice as fast per second!!) on supported screens.
Remember to choose a refresh rate that aligns with the frame rate of the content you’re viewing. For example, if the content you’re viewing is 24 frames per second, a 48Hz refresh rate will be your best option. Otherwise, it will cause visual defects such as screen tearing or the soap opera effect, which will provide a poor viewing experience.
Once you’re done, it’s recommended to switch back to the default settings for your screen as daily computing tasks typically have lower refresh rate requirements.
For Linux Users
Here’s how you can change the refresh rate on different Linux desktop environments:
If you’re using Gnome Shell (Ubuntu) or KDE Plasma 5:
- Press the Win key on the keyboard.
- On the search box that appears, type “Display.”
- From the search results that appear, select “Display” to access the refresh settings for your desktop.
- From there, look for the “Refresh Rate” section. It will have a drop-down menu with refresh rate options available for your screen.
- Select an option supported by your monitor, and you’re all set!
If you’re using XFCE or Mate, you can use commands to change your refresh rate.
- Press Alt + F2 to open up the quick-launch application.
- Type “mate-control-center” into the text box if you’re using Mate and “xfce4-settings-manager” if you’re using the XFCE desktop environment.
- >Press the Enter key to launch the command.
- Once inside the control center, scroll down to the Hardware section, then select the Display button to open up the XFCE Display Settings.
- Find “refresh rate” from the drop-down menu and choose the correct setting for your monitor. Then, click on “Apply system-wide” to confirm the changes.
This guide helps you choose and use your preferred refresh rate without image tearing. However, if you encounter any problems in getting it right, you can just as easily turn to discussion forums to get help from the community.
Final Thoughts
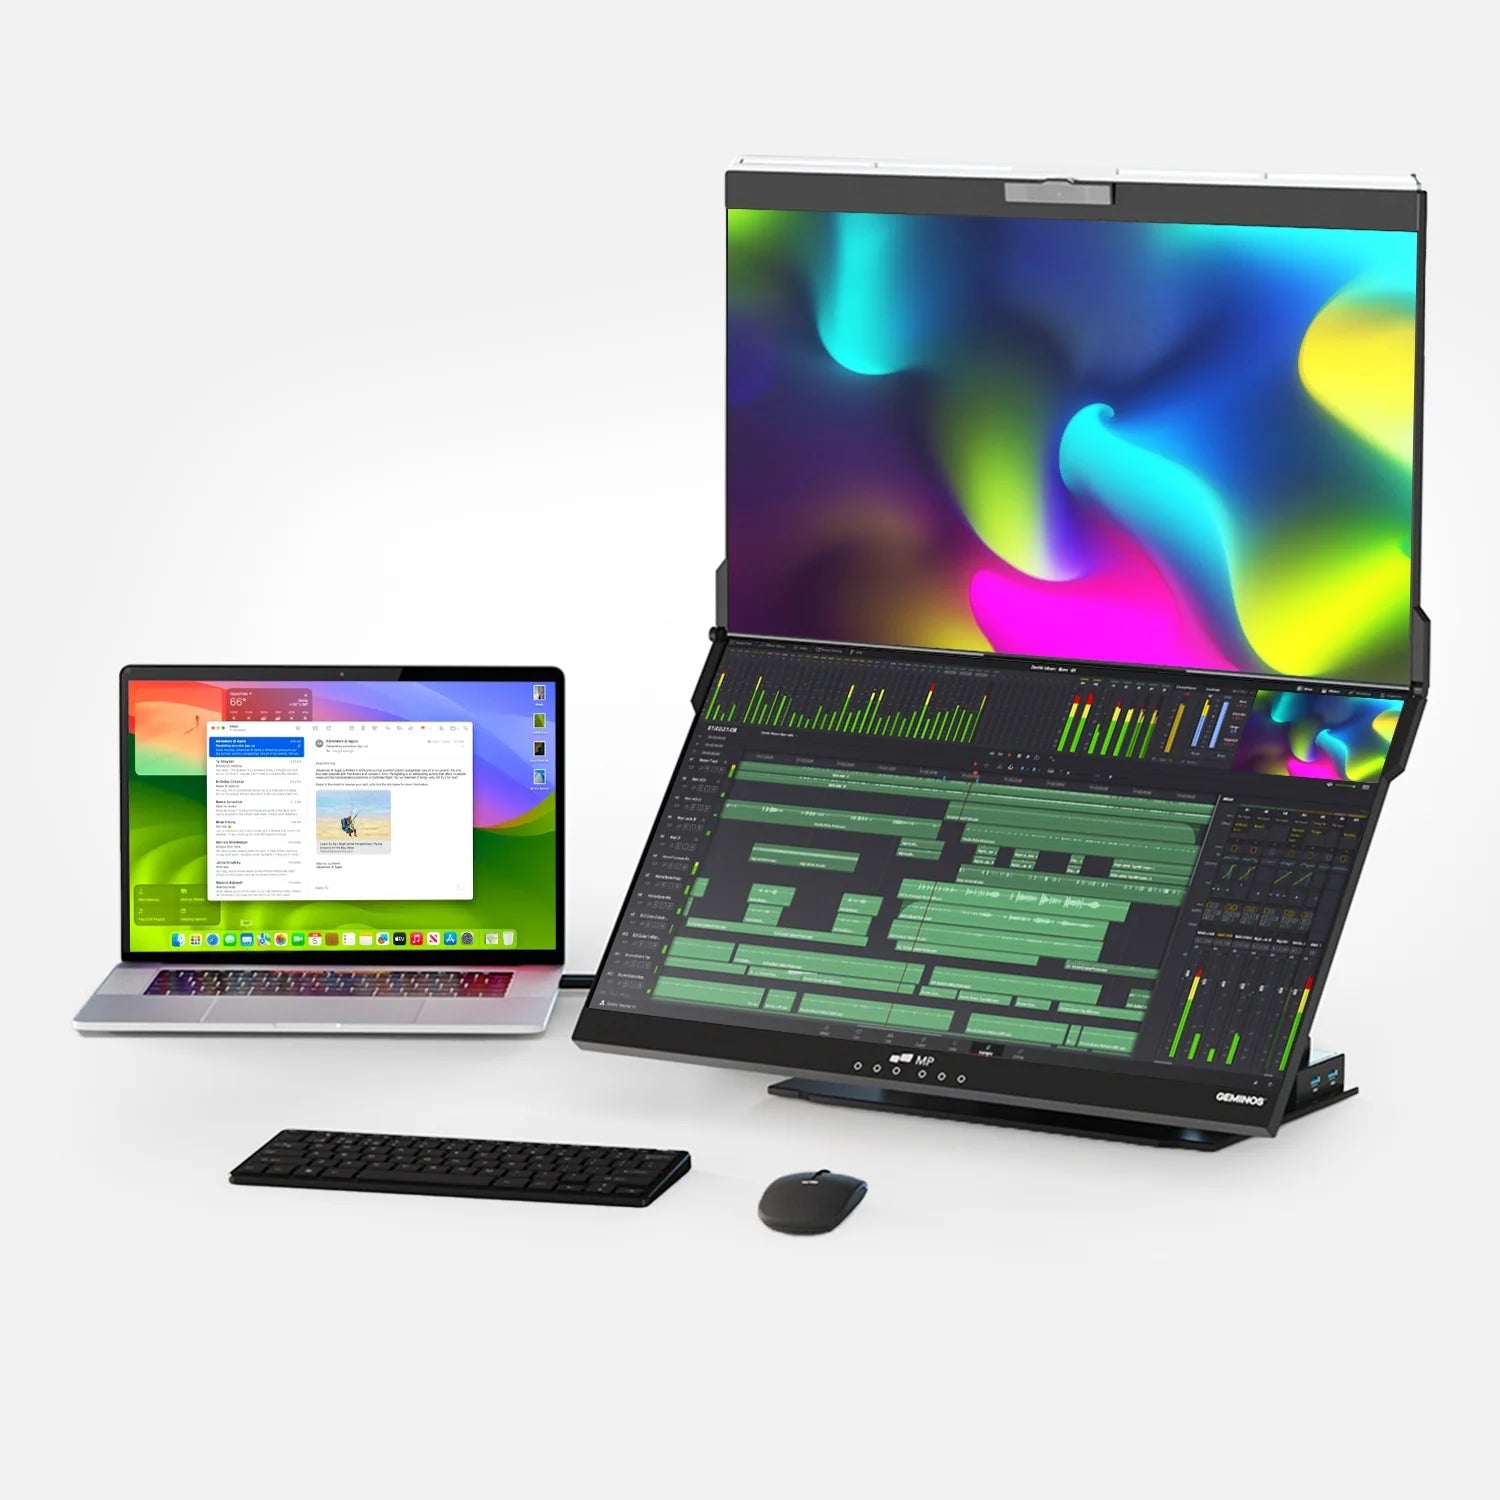
The right refresh rates can provide you with an immersive experience that will give you a renewed appreciation for your computer. When you adjust the settings on the plug-and-play Mobile Pixels Monitors, you can transform your viewing, working, and gaming experience like a pro.
Visit our website today for accessories and peripherals that help you embrace your creative vision.
Discover Tech Gadgets


Leave a comment
All comments are moderated before being published.
This site is protected by hCaptcha and the hCaptcha Privacy Policy and Terms of Service apply.